
How to Share Files with OneDrive
As file sizes increase, it becomes harder and hard to use email to distribute them for collaboration—it fills up mailboxes, and depending the restrictions (either on our side or our partners) the file may be too large for email.
OneDrive to the rescue! With this, you'll share a link that the user can click on to access the file (or folder). You can even give them permission to edit files if you want to collaborate with them. Here's how to do it:
- Go to your OneDrive in your web browser (https://christmanco-my.sharepoint.com). You can do this on your local machine as well if it's a file/folder you know is synced with OneDrive (which should be your Desktop, Documents, and Pictures folders).
-
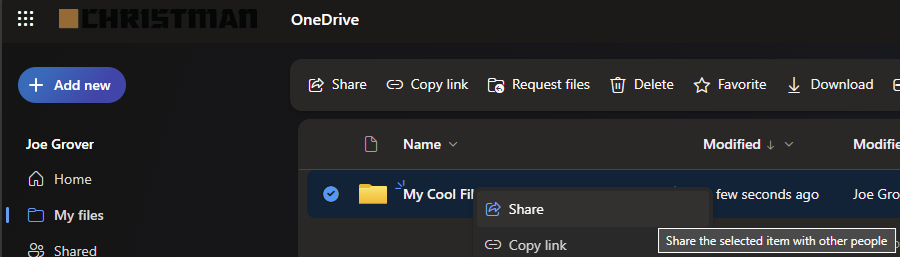
Right-click on the file or folder you want to share and click Share. If sharing a folder, feel free to create a new folder for this and copy the files into it so you know that only the stuff you want to share is in it, and you don't mistakenly share more than you intended!
-
Type the person's name (for an internal person), a group name (such as a Team), or email address (for external people) in the box and hit Enter. If the recipient is external to the Christman family of companies, you'll receive a notice. This is so you can be sure that the contents of the file or folder you're sharing is acceptable to be shared outside the company.

Click Continue here to proceed.
- Repeat the above step to add any users that you want to invite.
-
Once they've been invited, you can set their permissions by clicking on the down-arrow next to the eye to the right of the box you entered the people into.

- By default the permission will be to view the file, and download it. You can grant the users the ability to modify the files (this will require them to have a Microsoft account), or you can also make it so they can only view it, but not download a copy for themselves (this won't prevent them from taking a screenshot of the document, however).
- Once you're satisfied with the list of invitees, you have a couple of options.
-
You can click in the Add a message box and type a brief message letting them know what the invitation is about (being more descriptive than, "Here are the files we spoke about" will help it look less suspicious when they receive it), and then click Send. Microsoft will send an email that may look familiar if anyone has ever invited you to access their files:

-
Alternatively, you can click the Copy link button to copy the link to your files to your clipboard, then compose your own email in Outlook. Paste the link into the body of that email and type up whatever email you like. The upside here is that the email will be a more personal email that comes from you (instead of the standard Microsoft invitation email), but the downside is you'd have to enter the recipients into this new email again (which can be a pain if there are more than a few of them and you don't already have them in a list). This will also be sent quicker (as Microsoft's system will queue the email to be sent, and may not go out for 10-20 minutes).

-
- Whichever option you choose, when the user clicks on the link it will take them to the folder (or file), and they can interact with it based on the options you set in the Share dialog above. Hurray!


But now you need to ask yourself: How do I change this access? Or remove it?
How to Modify or Remove Access to Shared OneDrive Files or Folders